A lot of people asked me about Nonlinear Analysis which can be a quite tricky subject for those who are coming from the linear static world, so I decided to write a post about some of my past experience to give you 5 tips that will simplify your life in nonlinear FEA analysis.
To clarify, I will be talking about nonlinear static analysis here, not nonlinear explicit transient which is another (complex) topic.
If you are still wondering why nonlinear analysis is important and why we do it, I enjoy you to take a look at this free webinar in 2 parts that I did some time ago which will give you a very detailed overview about the topic: part 1 part 2
5 simple tips that will simplify your life in nonlinear FEA analysis
1- Optimize the number of elements and nodes in your model
As you probably know if you are ready this article, nonlinear analysis is particularly time consuming. If you want to get accurate results, you’ll need small size mesh, but If you create too small mesh, it will just take ages to solve…
The trick is to create smaller mesh in the area where you need it and larger mesh in areas which are not determinant for either the convergence or the accuracy of the solution.
For example:
– Contact region where convergence depends on the mesh size and quality
– Zone where you are interested to get the stress results
Hybrid meshing will also help you to decrease number of mesh by keeping accuracy at the same time.
2-Generate manually the mesh rather than using exclusively the auto-mesh function
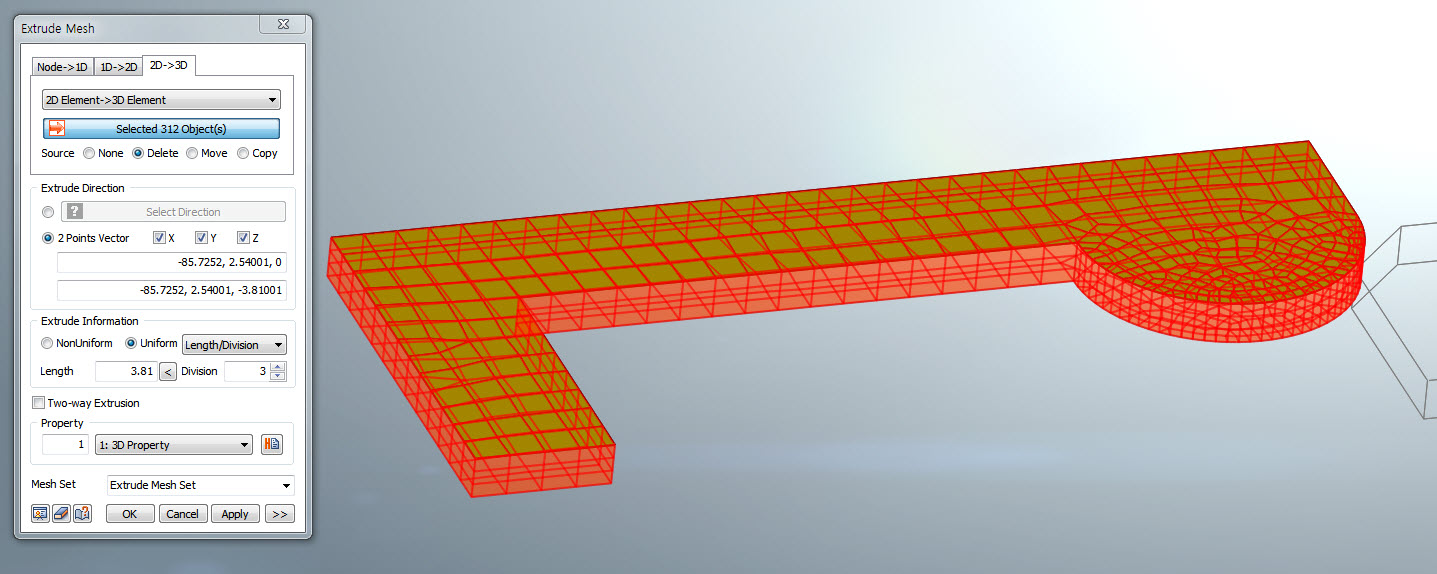
Don’t listen the guys saying that auto-mesh function will do everything, most of the time, when you want to get accurate results in nonlinear analysis, you will have to create manually your mesh to get nice and regular shapes and results coming with it.
If you are wondering how to do that, here is a tutorial
3- Beware Boundary Conditions and Degrees of Freedom(DOF)
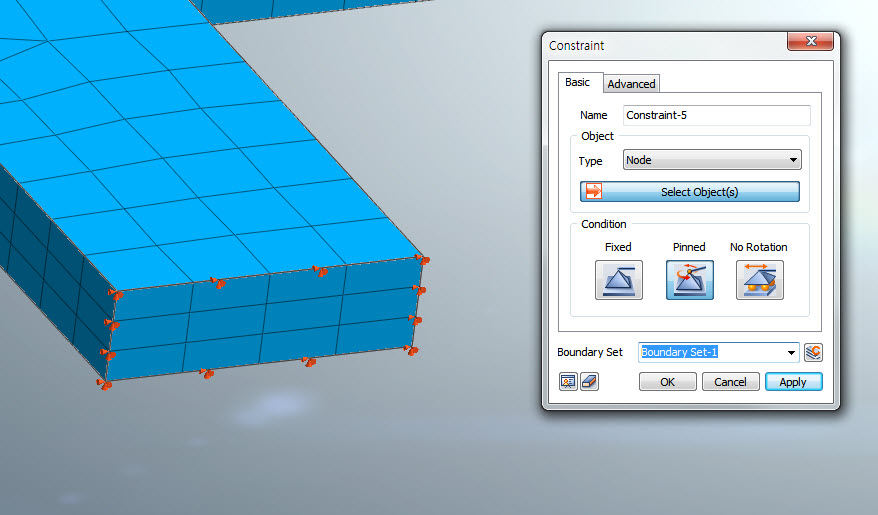
If you are getting a singularity error like the error below when you perform your analysis, it is probably that you didn’t correctly set you boundary conditions.
You can check where the problem lies easily using the query tool
In this particular case, I forgot to assign the forced displacement in the x direction so I just solved the issue by pinning the surface in the photo
4- Set correctly the contact definition
Contact is a very critical part of the model and require a special attention in the setting of the contact conditions.
1)Mesh should be good enough in the contact area, which means:
– Same order of mesh size in both respective pars in contact
– At least 3 layers of mesh in the contact
2)Contact settings should be properly set
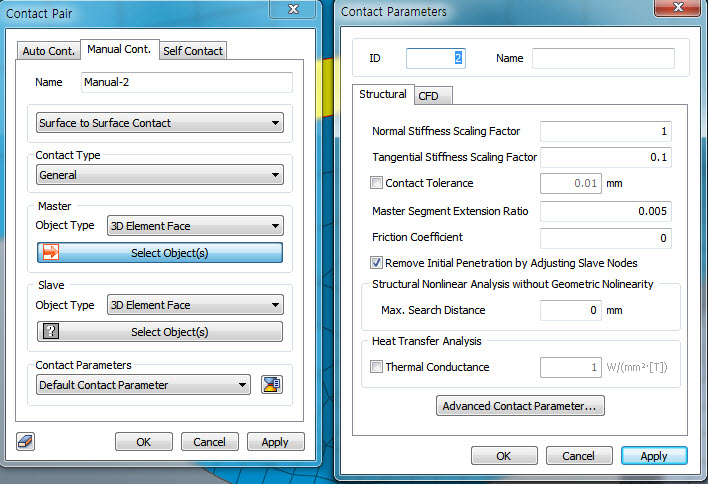
If parts are not in contact at the beginning, general contact have to be used.
If “Surface to Surface contact” is chosen, Master and Slave surfaces are not important, but in case convergence is difficult, “Node to Surface contact” have to be chosen and Master and slave defined correctly (This is important for rubber materials than encounter large deformations for example).
Contact algorithm in midas NFX is using the penetration method and Stiffness scaling factor will help to get a better convergence if the contact is too stiff (contact force and stresses will be less accurate in exchange of the gain in convergence speed).
If you observe some penetration of the 2 surfaces in contact, this is normal and this is due to the penetration algorithm itself. By activating the contact tolerance option, the penetration will be decreased, but in return more iterations will be needed.
For a detail explanation about contacts, you can refer to the second part of the webinar I did previously on the topic.
5- Analysis case settings are very important
Analysis results and convergence are very dependent of the analysis case settings.
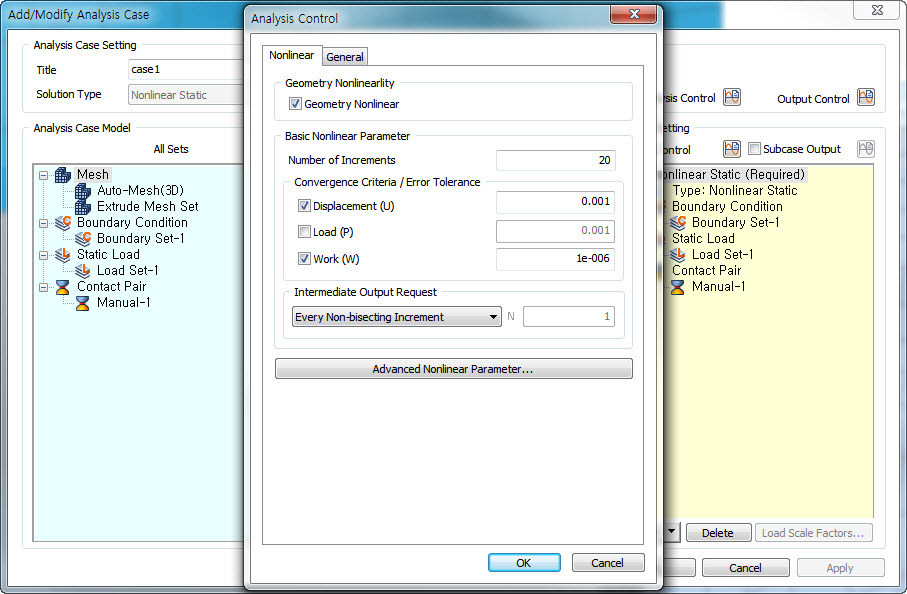
1) Activate the Geometry Nonlinear option
This option allow large displacements in the nonlinear analysis calculations and so it is very important to activate it in any case where large displacements have some chance to happen (most of the cases in nonlinear analysis).
2) Number of increments
In Nonlinear analysis, the load or displacement applied is divided into the number of increments defined here. for each individual increment, the stress-strain relation is approximated as the tangent to the initial stress-strain curve.
So if the number of increments is not sufficient and the approximated tangent modulus cannot follow the real stress-strain curve, error is created and analysis diverges, this is why the number of increments should be high enough (proper number of increments should be determined by iterations and trials),
3) Convergence criteria
In function of the type of loading (displacement of force) and the shape of the stress-strain curve a different combination of 2 convergence criteria either Displacement+ Work or Load + Work.
If you want more details, you can refer to the first part of the webinar I did previously on the topic.



Hi Cyprien
I was interested in the purpose and meaning of stiffness scaling in the contact definition and it seems I have part of my answer from your video tutorial, thanks. I will still need to do some more reading to be absolutely clear on how it is applied in the mathematical models.
A very useful tutorial as it has taught me a new trick, where to change the number of Legend steps. You also highlight a number of useful functions that I had learnt in practice. Definitely a good video for those starting out with nonlinear static with contact in Midas.
Thanks Vaughan! If you have ideas for new videos or post, please do not hesitate!
Hi Cyprien,
Good tips!. Just a question, midas nfx uses the true or the engineering stress-strain curve?
Thanks!
Hi Ezequiel, it uses the engineering SS Curve. You’ll have to make a conversion of your data if you have the true SS Curve.